When you open a device, you'll see a canvas for building your signal chain. From here you can add and connect nodes, configure their settings, and send the configuration to your device.
Add Nodes
Select the + button in the bottom toolbar to see a list of all available node types. Select a node type to add it to the canvas.
You can remove a node by selecting the X button on its card.
| Node | Description |
|---|---|
| Broadband Source | Record broadband signal from electrodes. |
| Spectral Filter | Apply frequency-domain filtering to broadband data. |
| Spike Detector | Detect spikes in broadband data using threshold or template matching. |
| Spike Binner | Bin detected spikes into time windows. |
| Spike Source | Record spike data directly from a peripheral. |
| Disk Writer | Write data to on-device storage in HDF5 format. |
| Application | Run a deployed Synapse App. |
| Electrical Stimulation | Stimulate through electrodes. |
| Optical Stimulation | Stimulate through LEDs. |
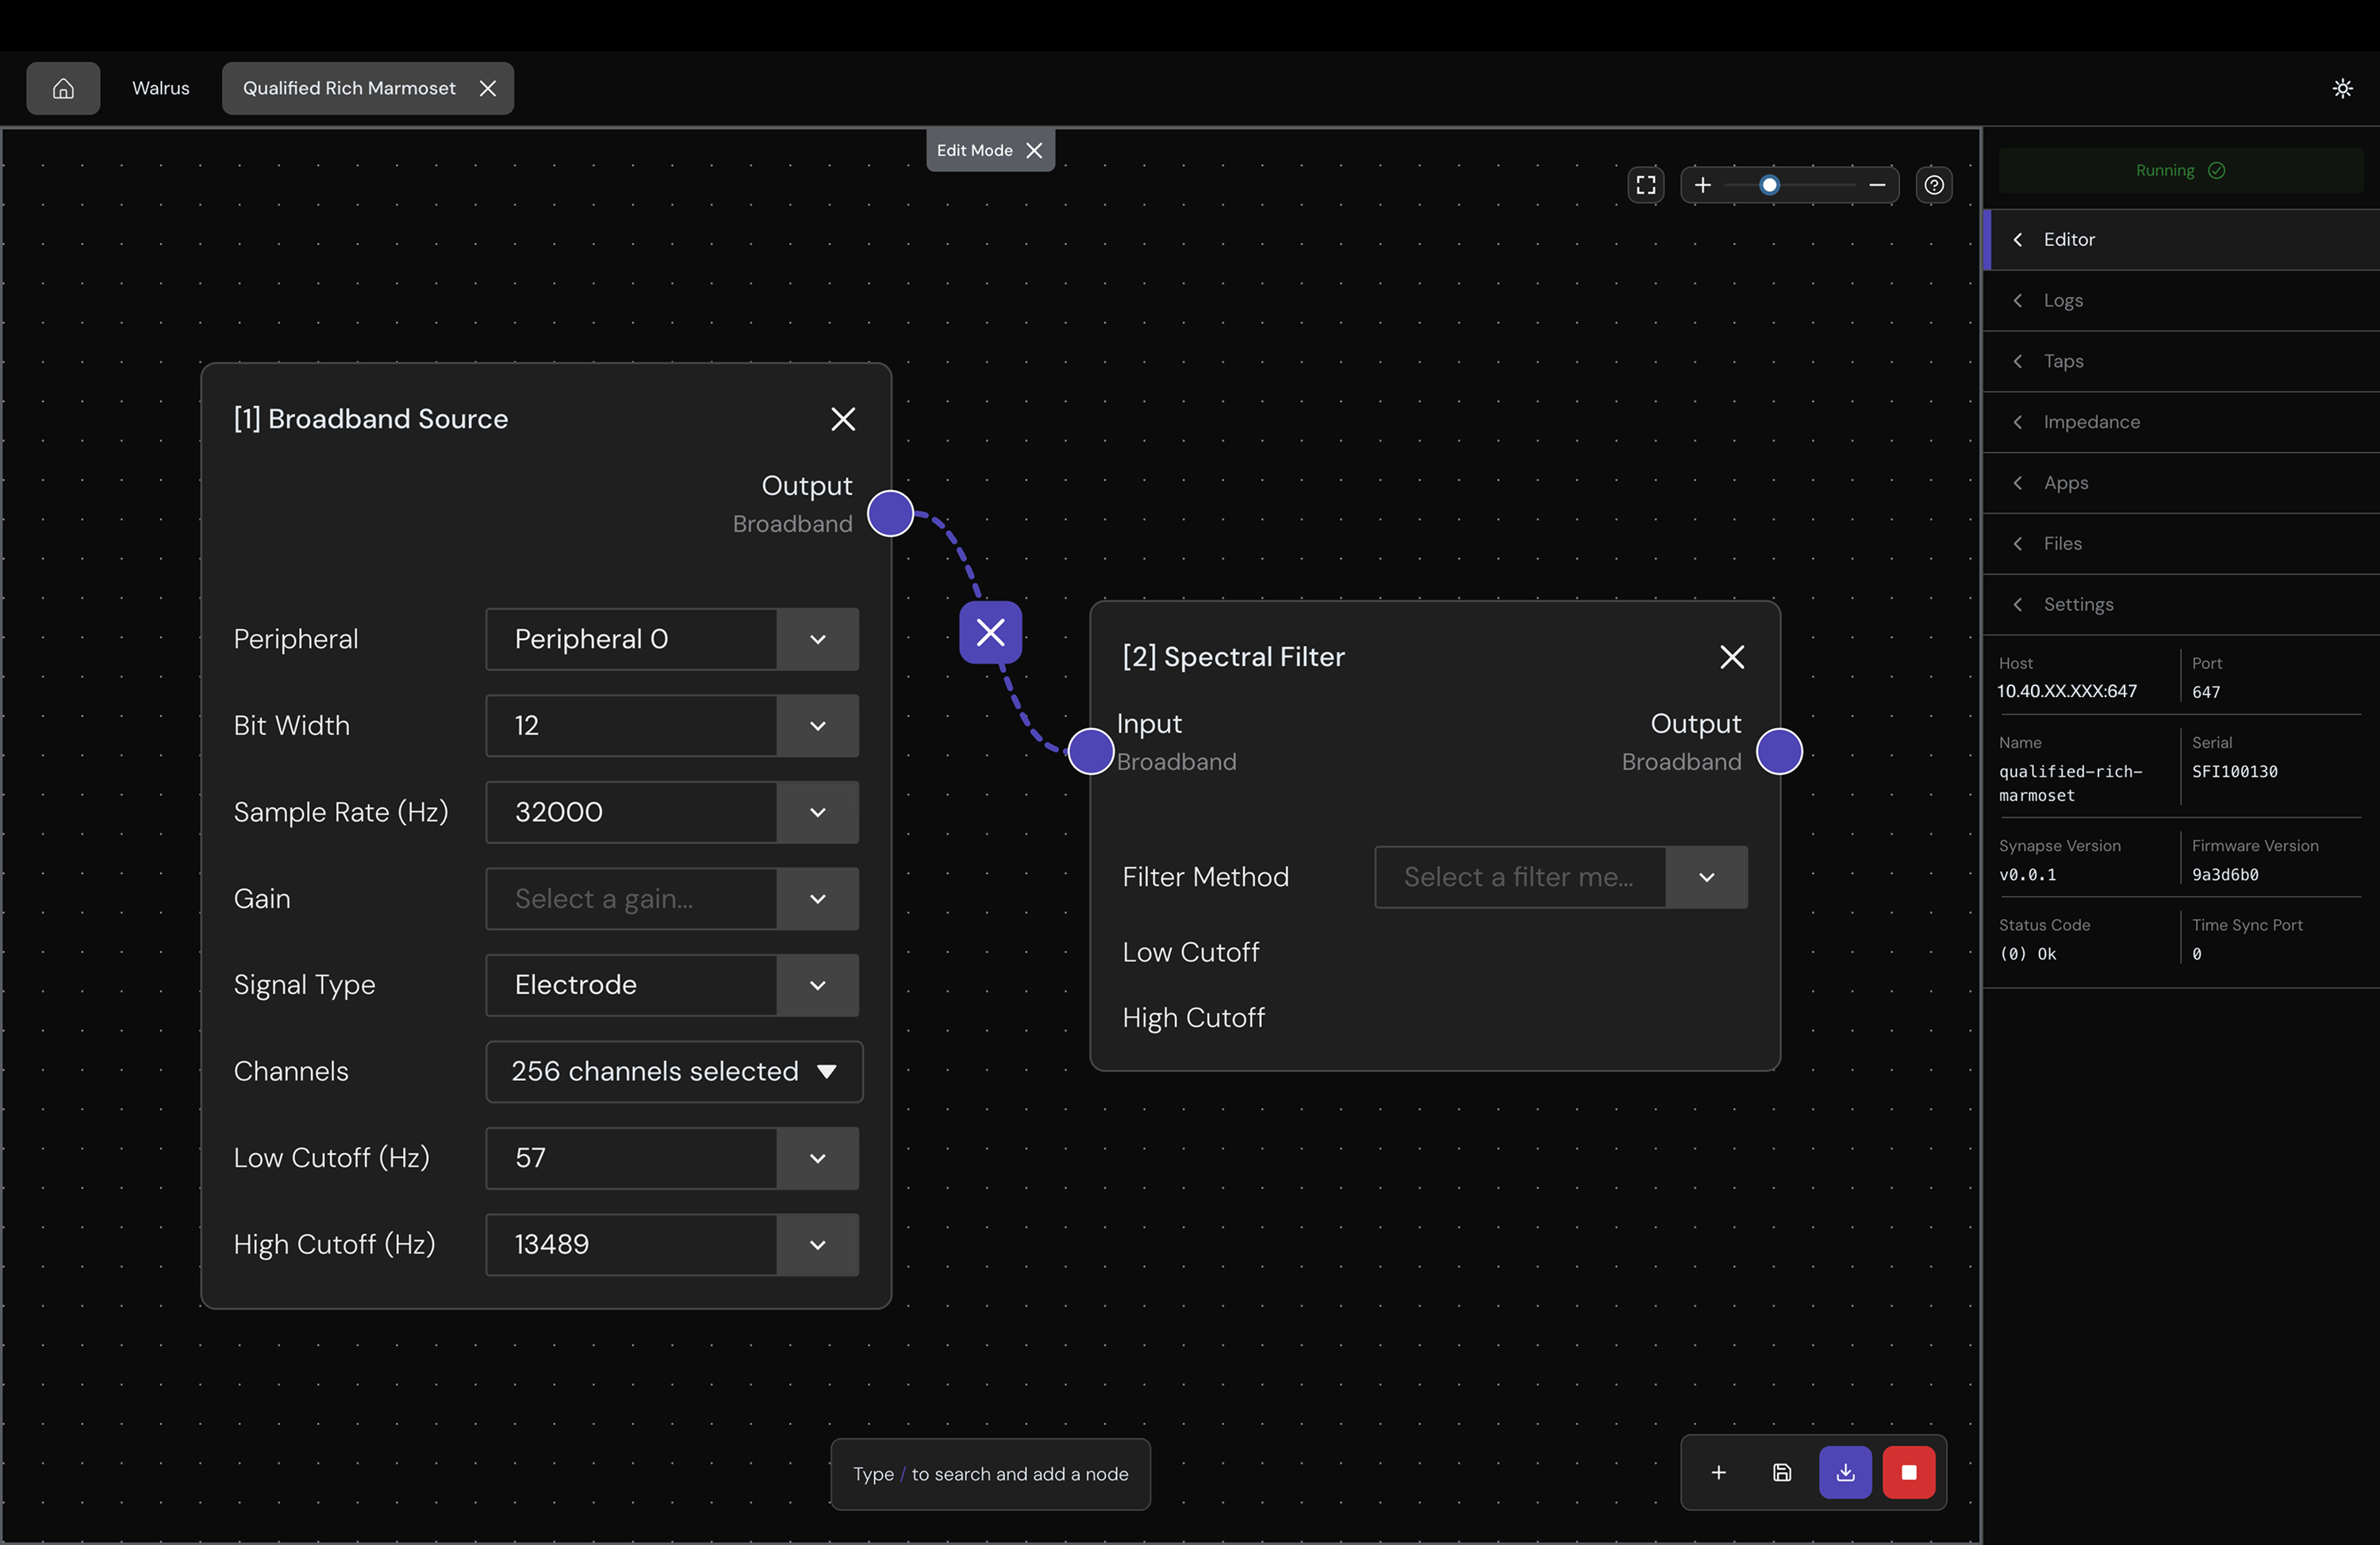
Connect Nodes
Connect nodes left to right by dragging the connection point of one node to the other. Connections are validated automatically, meaning you can only connect compatible signal types (e.g., a Broadband Source output to a Spectral Filter input).
To remove a connection, hover over the edge and select the X button that appears at the midpoint.
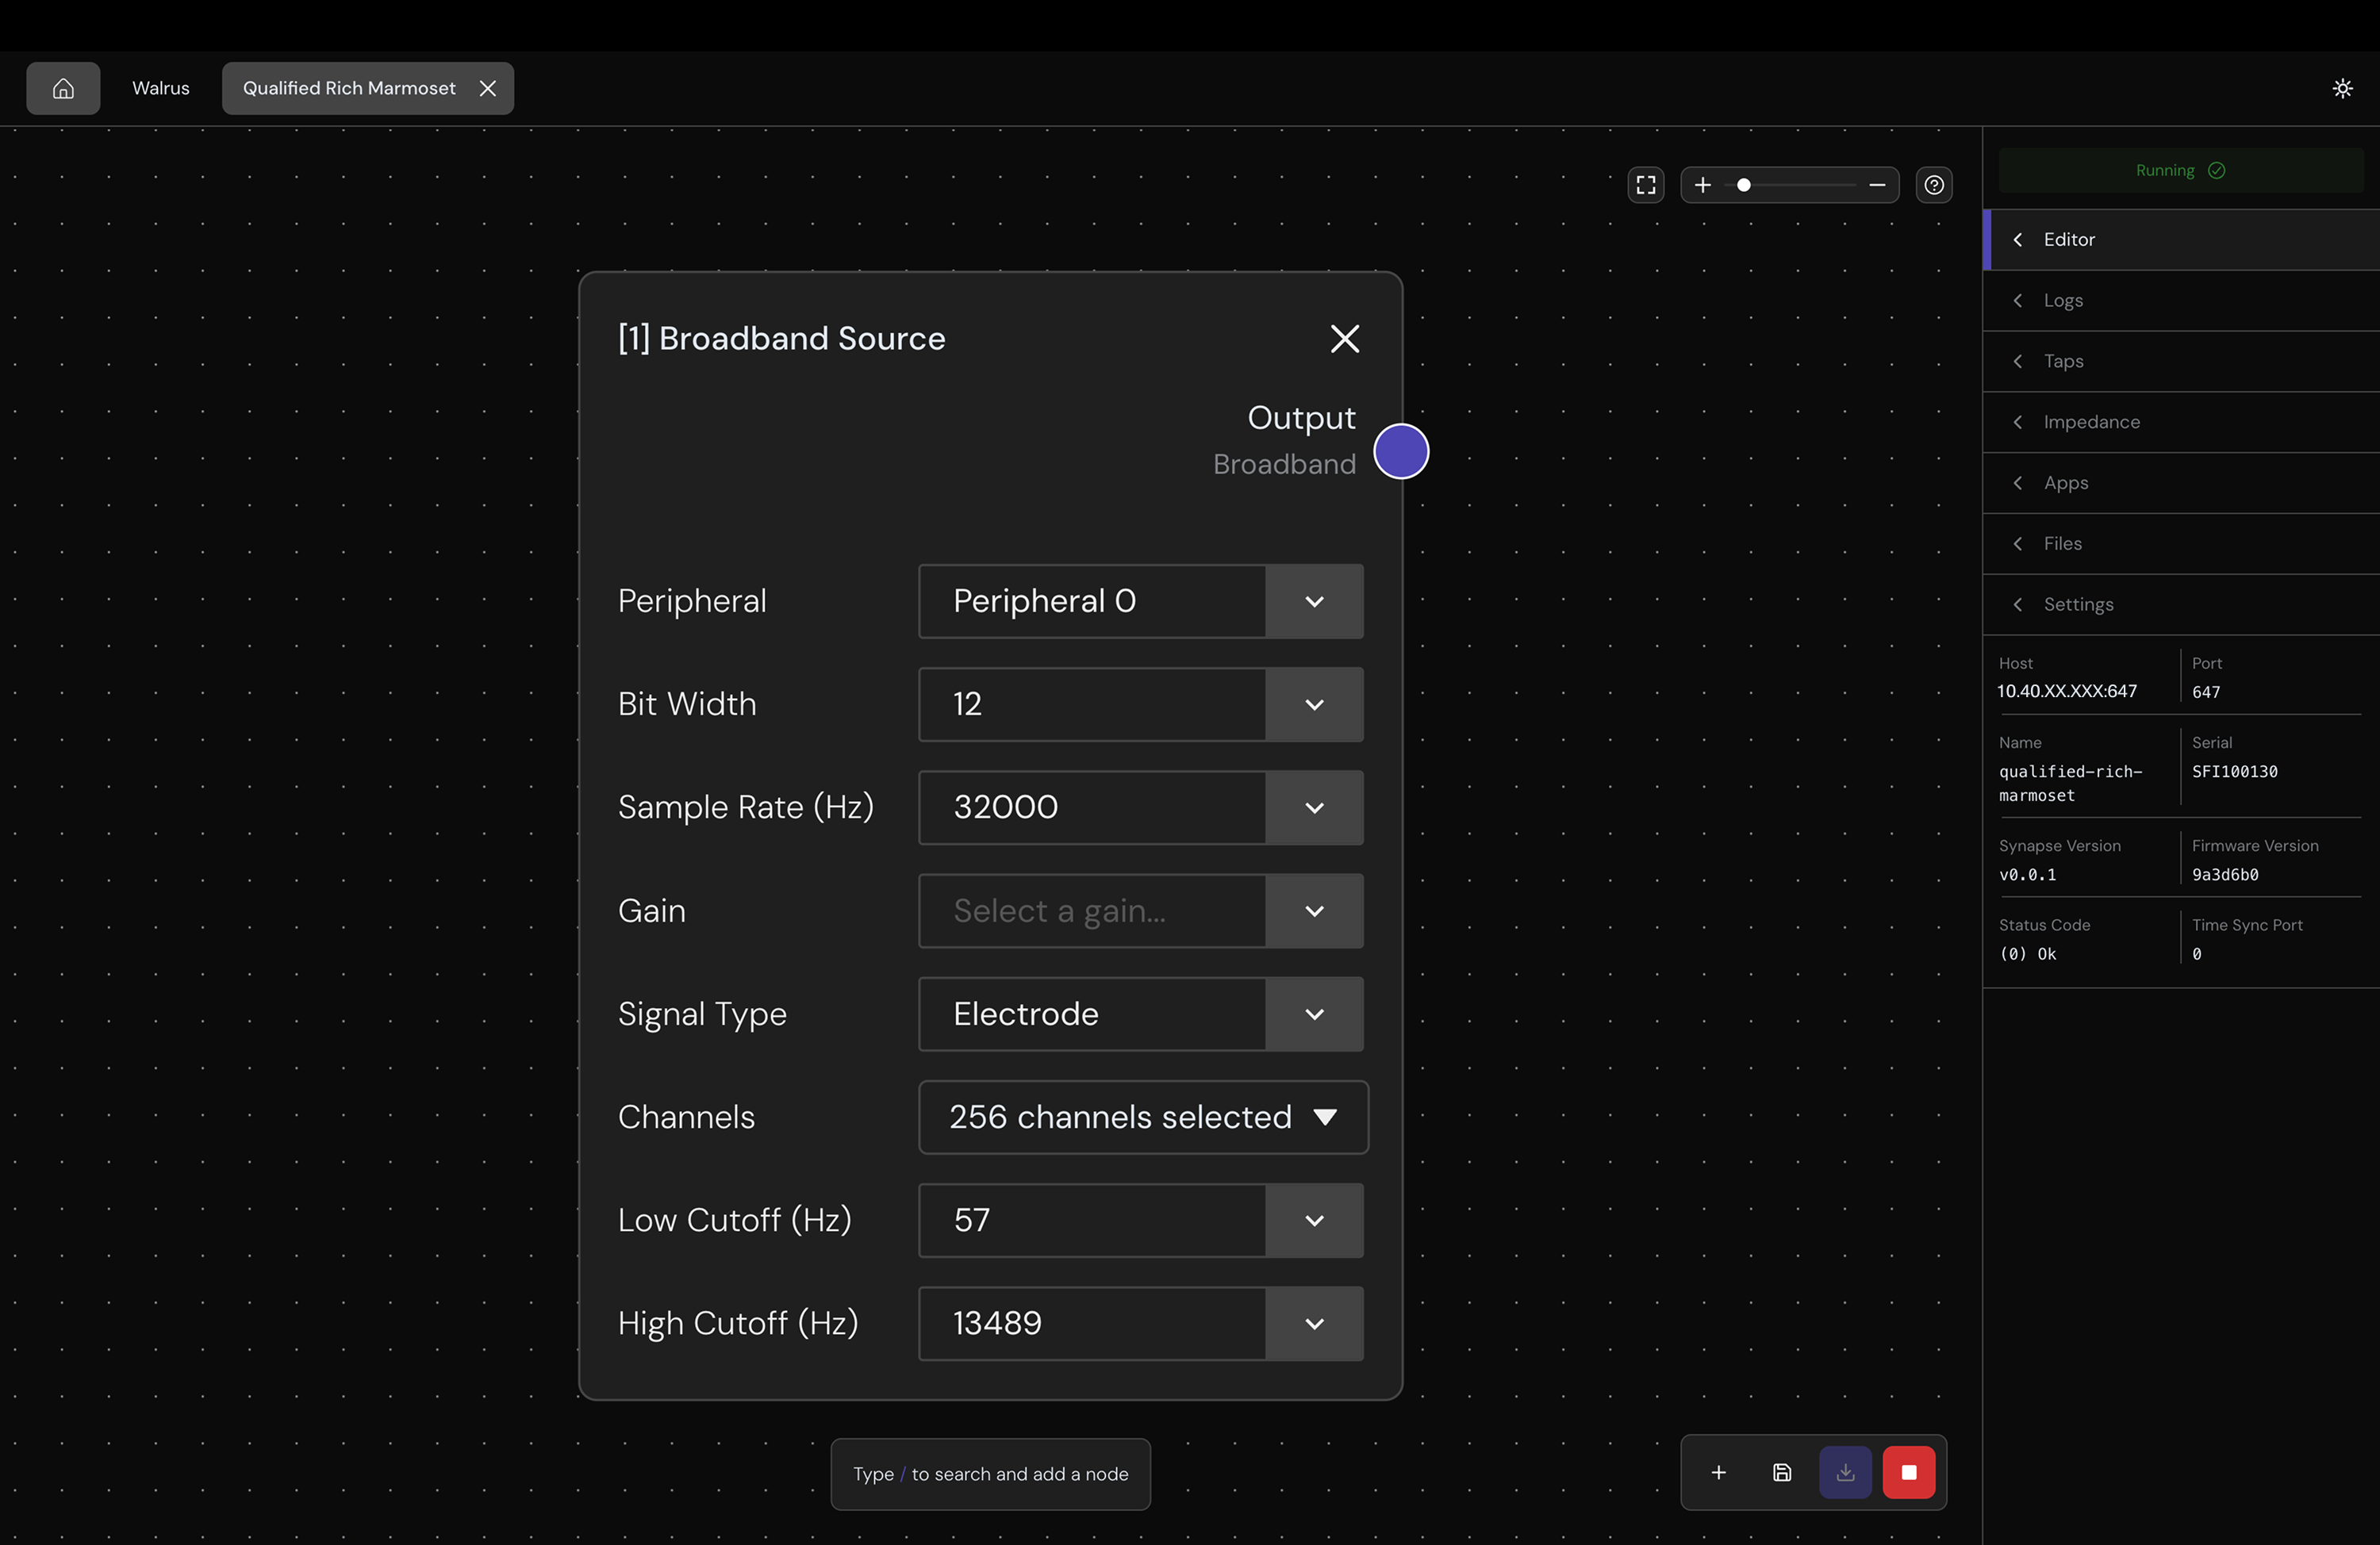
Configure Nodes
Use the inline fields on the node cards to configure your parameters. For the full list of parameters for each node type, see the Synapse nodes reference.
Send Signal Chain to the Device
Select the ↓ update button to send your signal chain to the device. If you have unsaved changes you want to discard, select X on the Edit Mode indicator.
You can export your current signal chain as a JSON file by selecting the Export button (save icon) in the toolbar.
To import a configuration, drag and drop the JSON file onto the canvas. It will load as a draft so you must select the ↓ update button to send it to the device.
Run an Impedance Test
Use the Impedance tab to measure electrode impedance before recording.
- Select the target peripheral from the dropdown. It lists all peripherals that support broadband recording.
- Select the target electrodes from the next dropdown. It will show preset options or Custom (enter ranges like
0-63, 128, 256-511). - Select Start New Test. The button shows elapsed time while the test runs.
Note: You must stop the signal chain before running an impedance test.
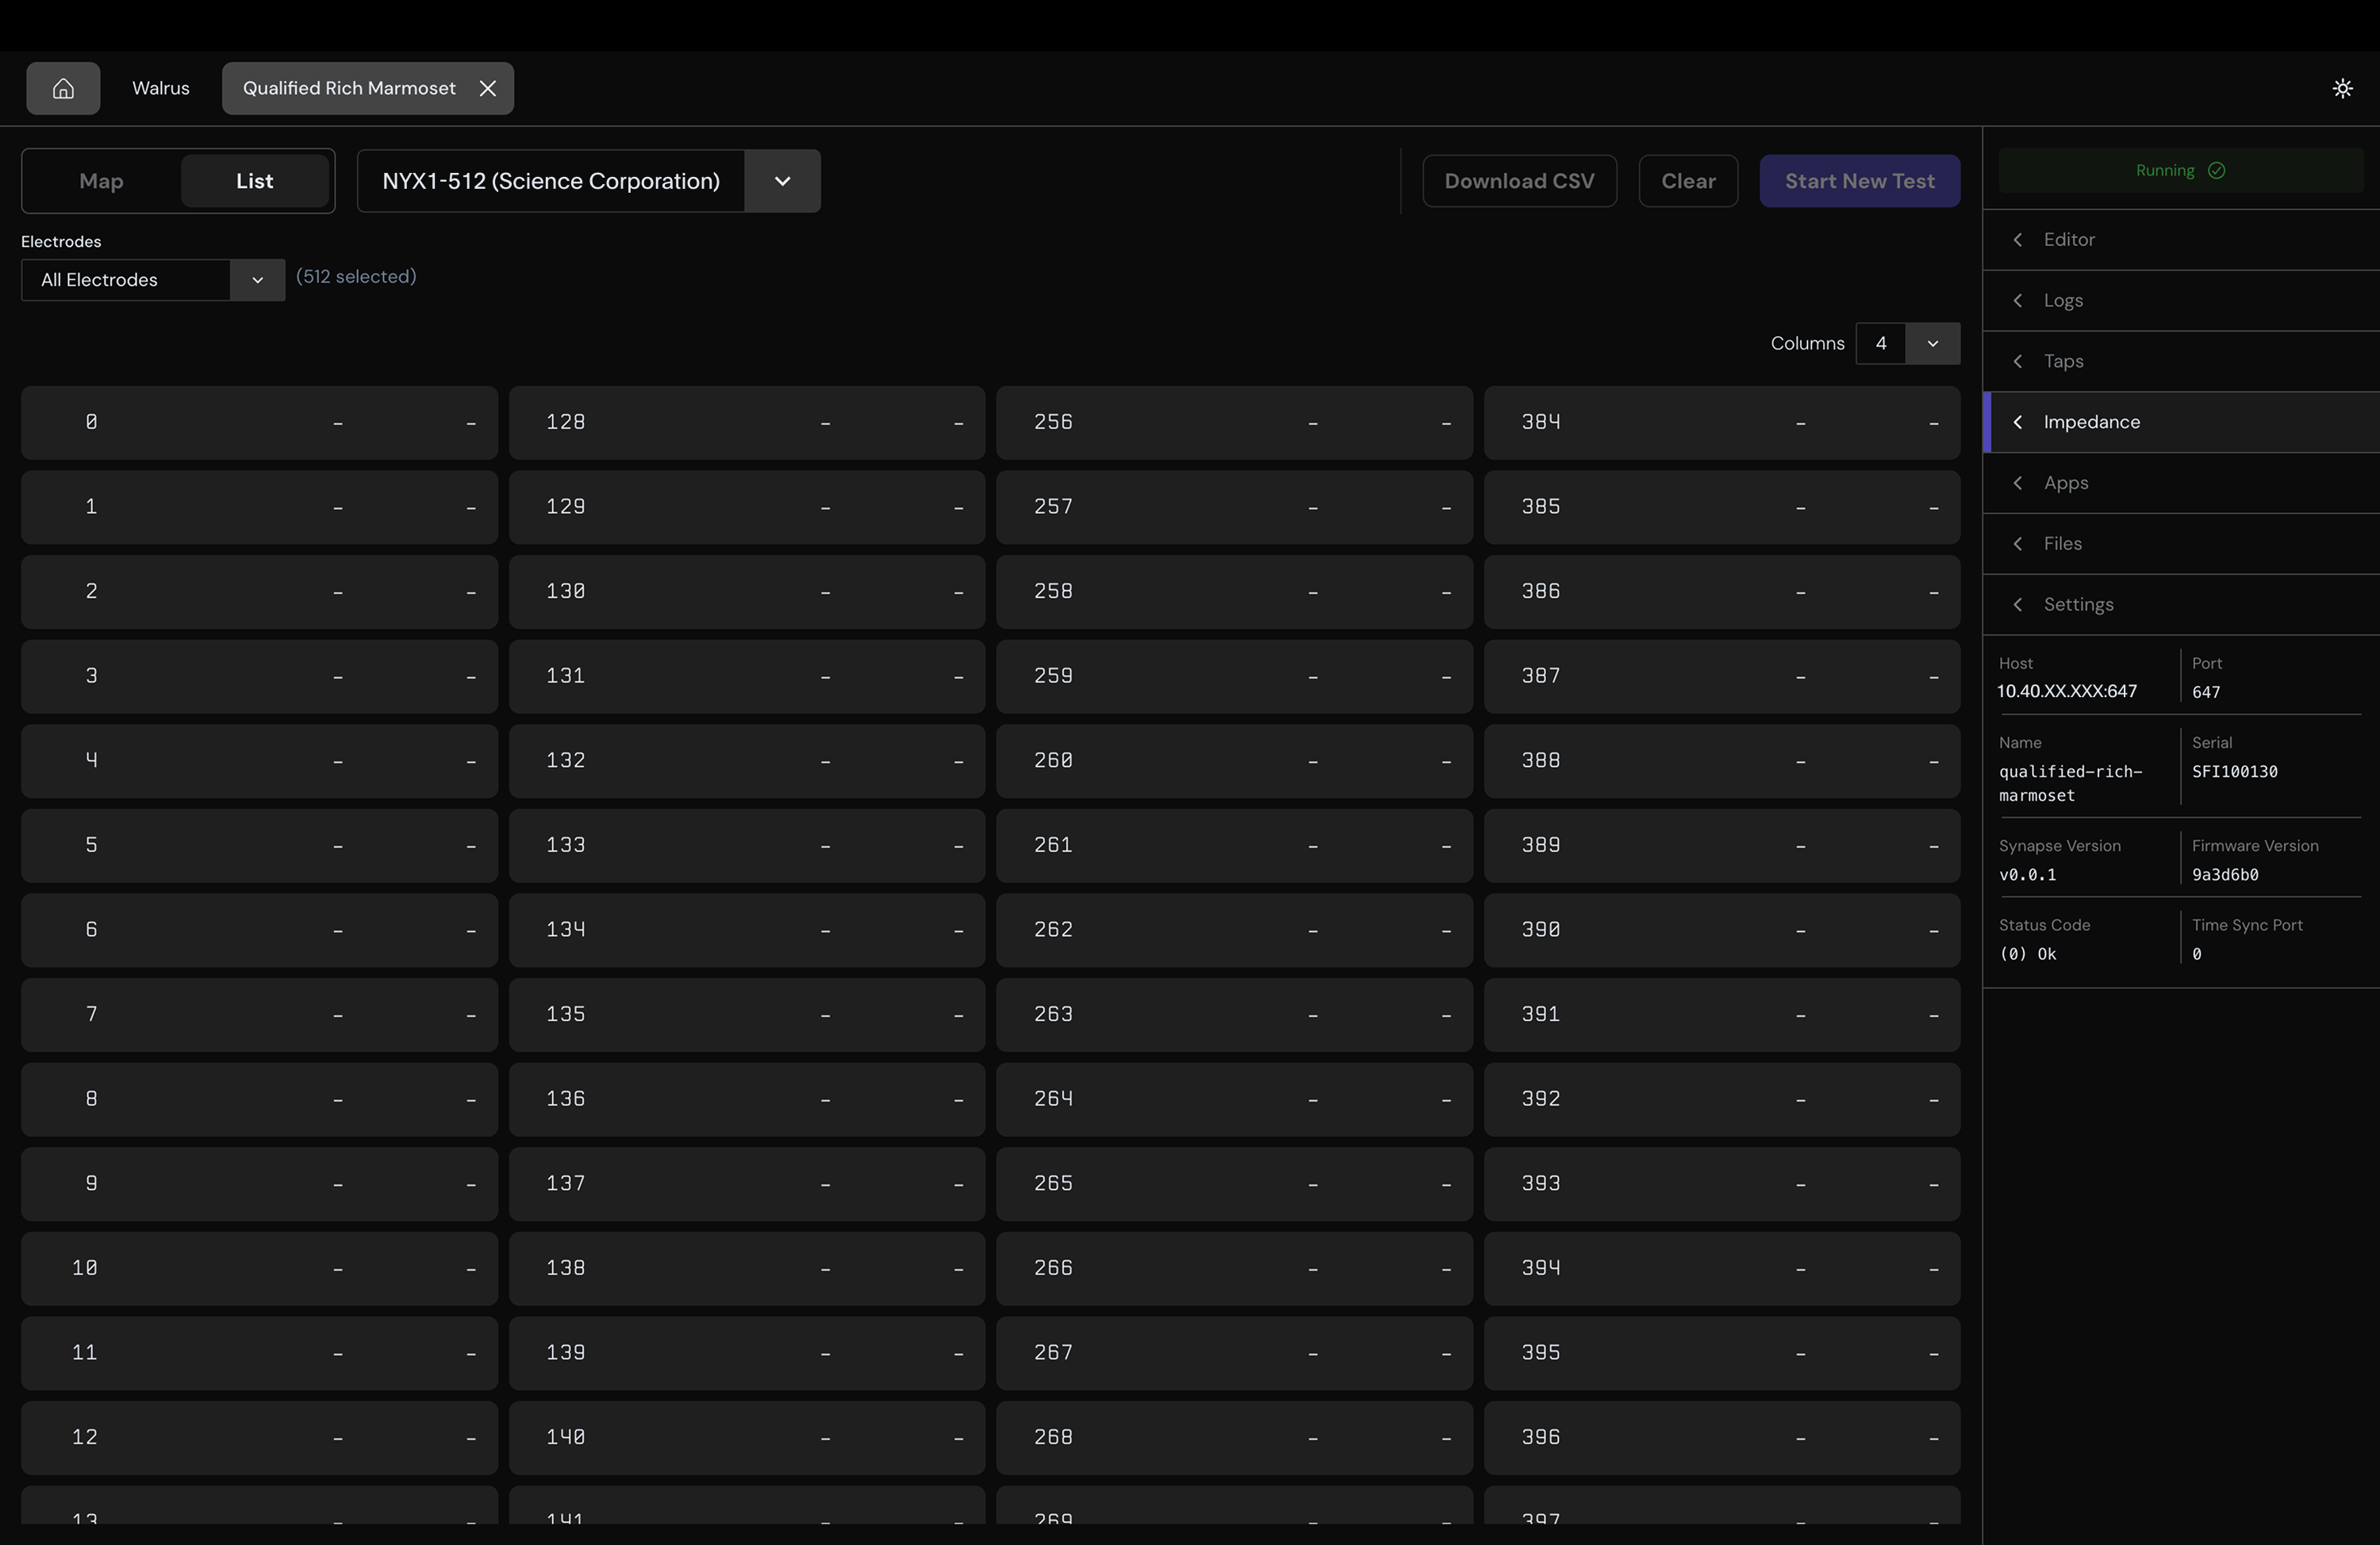
View Impedance Results
Results are displayed in two formats:
- Map — a spatial grid matching the physical electrode layout. Each cell shows magnitude (kΩ) and phase (degrees). Cells are color-coded green (pass) or red (error). Hover over a cell for full details.
- List — a multi-column table that shows electrode ID, magnitude, and phase.
Select Download CSV to export results: electrode ID, magnitude (Ω), phase (degrees), and status for each electrode.
Deploy an App
Synapse Apps are custom applications that run directly on your device as part of your signal chain. They can process neural data, run inference, or trigger stimulation in real time. See the Synapse App documentation to learn how to build one.
Use the Apps tab to deploy and manage Synapse Apps on your device.
- Select Deploy App (or Deploy Your First App if none are installed).
- Choose a
.debpackage from the file picker. - Wait for deployment to complete.
Once deployed, an app is available as an Application node in the signal chain.